Makeup technique hub
How to Contour Different Nose Shapes
Every tutorial draws the same two brown stripes down the same imaginary nose, and then people wonder why the result looks muddy on their own face. Placement that slims a wide bridge does nothing for a droopy tip. Shading that softens a hump would flatten a low bridge into nothing.
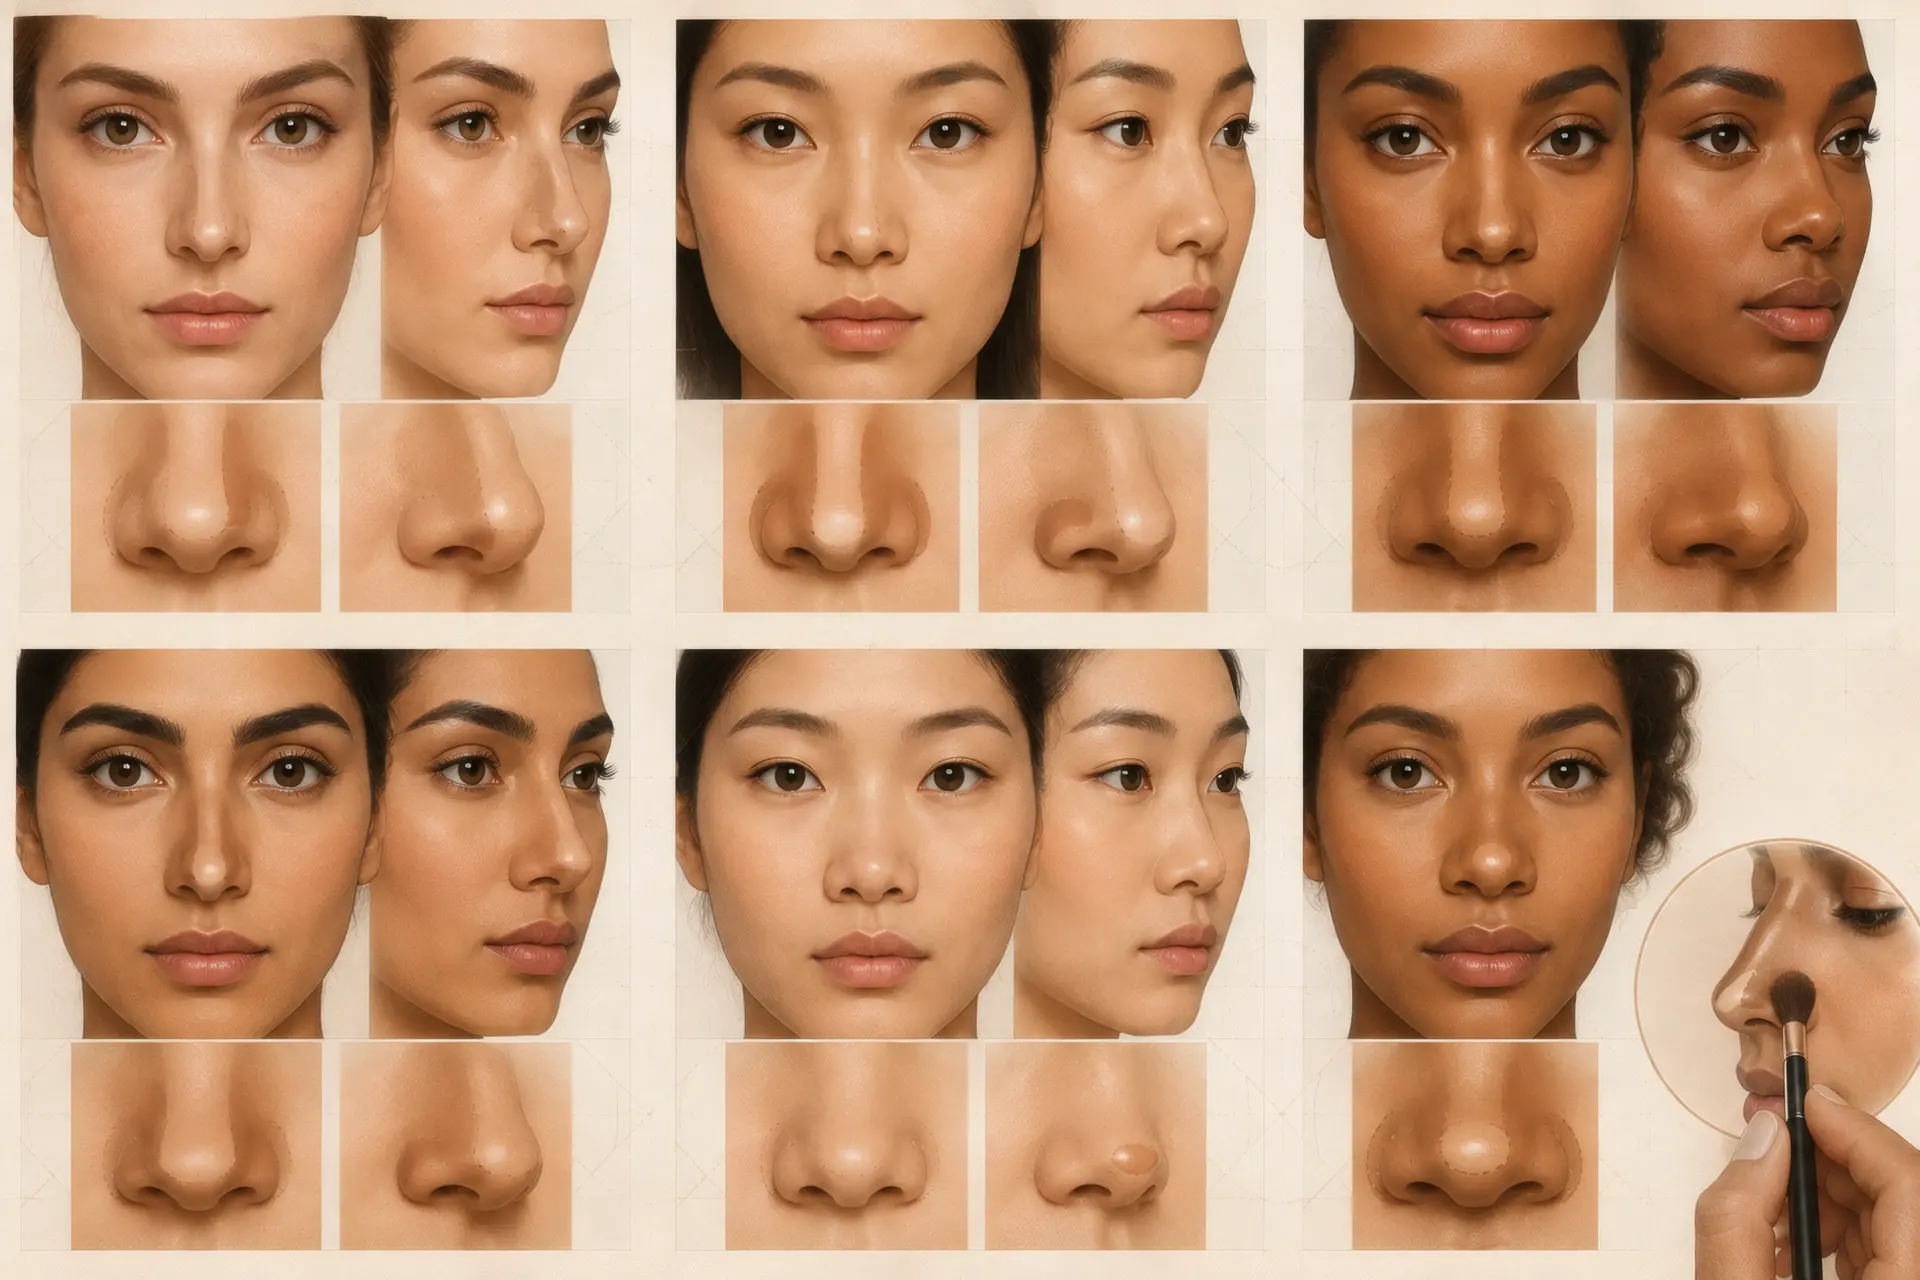
Contour is an optical trick. Pigment deeper than your skin reads as shadow, lighter pigment reads as light hitting a raised surface, and your brain fills in the geometry. Nothing structural changes. Bone stays bone. But the nose your face presents, in person and in photos, shifts noticably once the placement matches the shape underneath. This page maps contour and highlight placement to six common nose shapes, with the product and brush notes that decide whether the trick lands or reads as dirt.
The quick answer
Match the contour to the shape. Shade the sides of a straight or wide bridge, shade above and below a hump instead of on it, shade under an upturned tip, and build a strong center highlight on a low bridge. Blend until no line survives. Not sure which shape you have? The free nose shape detector reads your bridge curve and tip angle from one photo.
In this article(7 sections)
Tools and shade selection
Your contour shade should be cool or neutral, matte, and one to two tones deeper than your skin. Warm bronzer is the common trap. I once watched a friend contour with the bronzer she used on her cheekbones, and by noon the sides of her nose read orange in daylight. Shadows on a real face are grayish, and your product should be too.
For highlight, go matte or subtle satin, one to two tones lighter than your base. Skip glitter on the bridge during the day. A shimmer stripe at the office reads as highlighter, and the illusion collapses.
Brushes matter more than palettes. A small angled brush places the line; a fluffy brush erases the edges. Cream formulas melt into the skin and forgive shaky hands. Powder grips oily skin and survives a long day. If you want product picks paired with your specific result, the nose shape makeup helper matches technique to what the detector finds in your photo.
Contour maps by nose shape
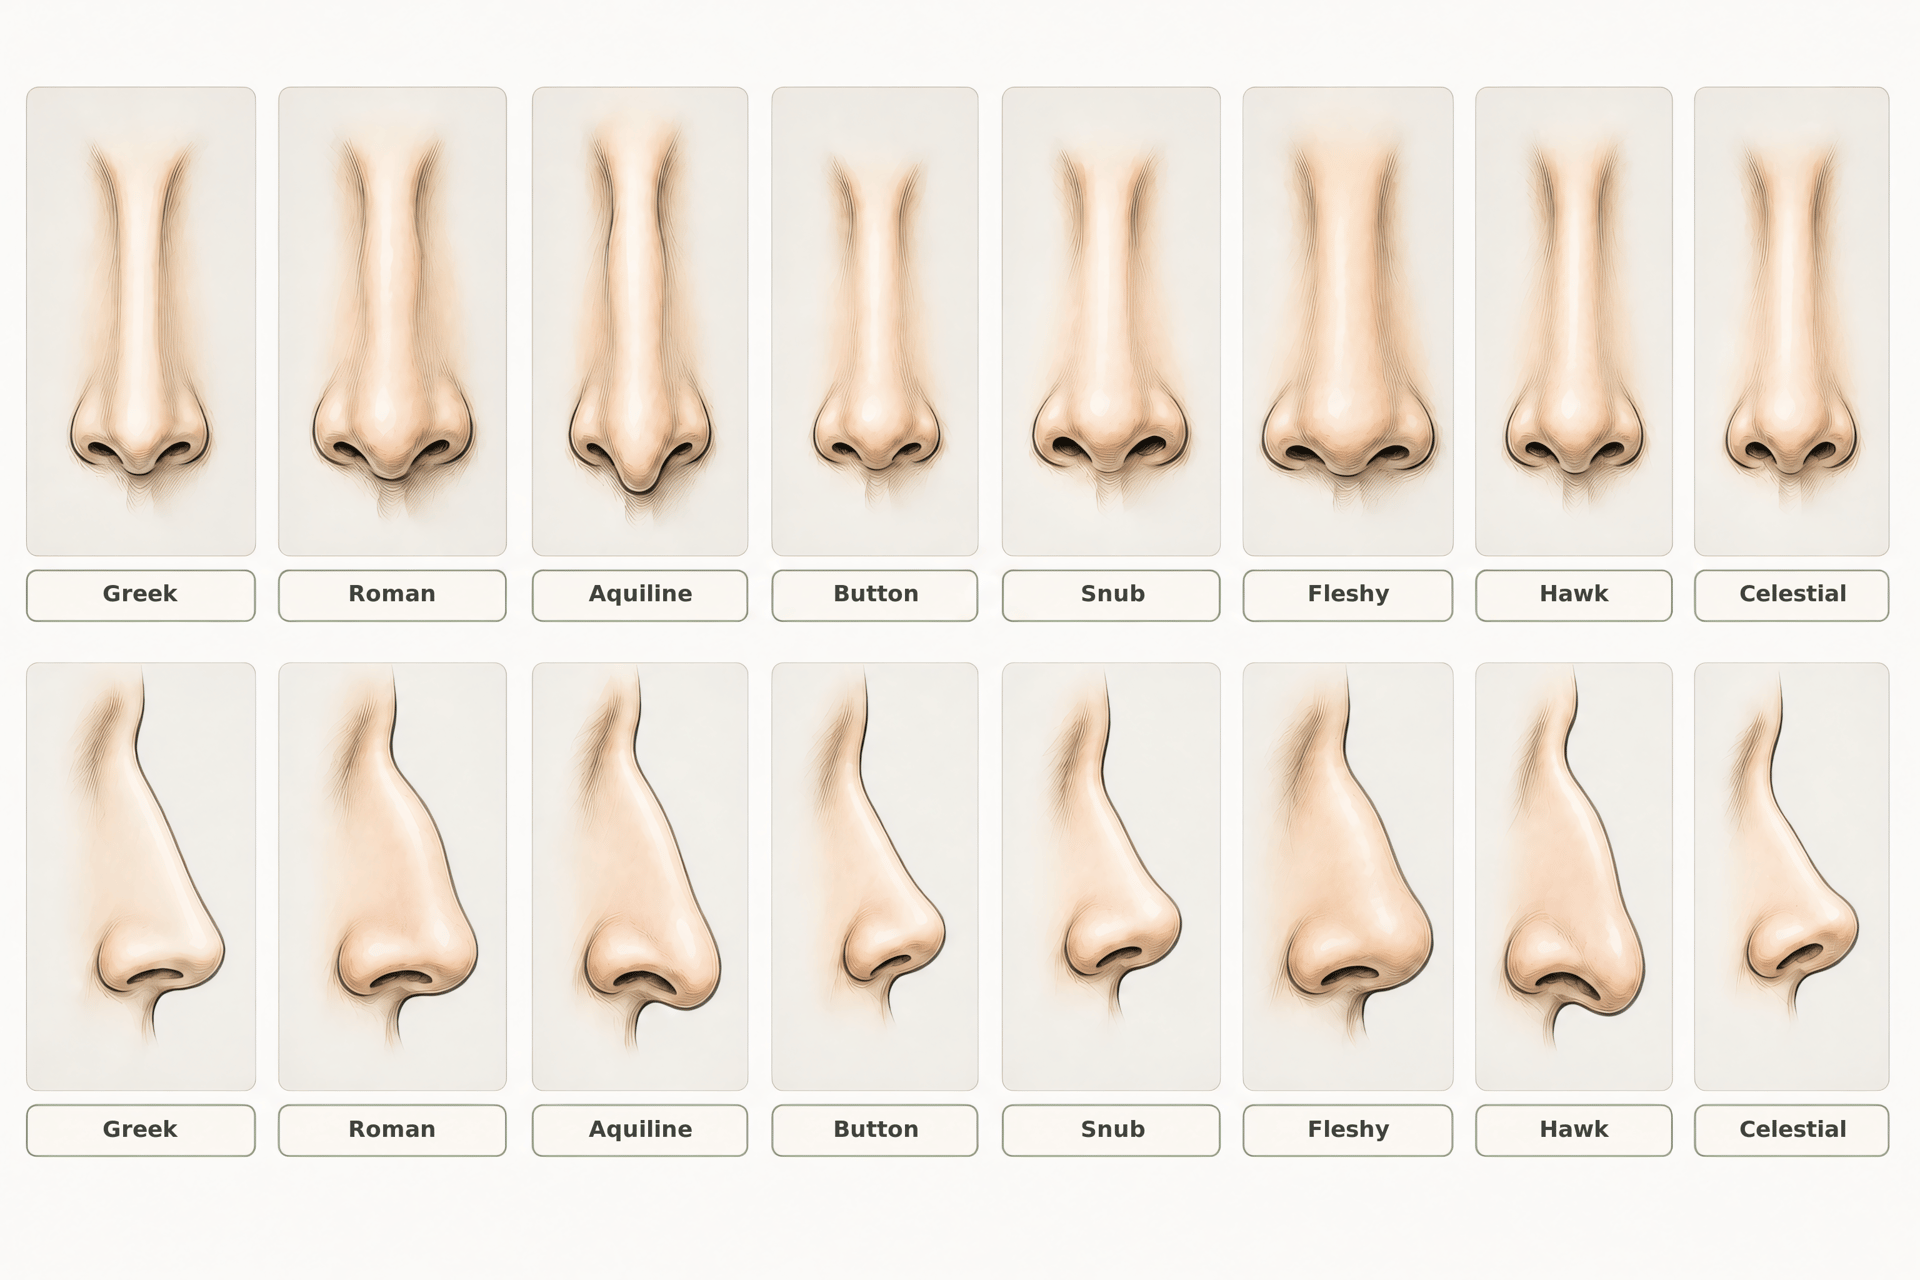
Placement is geometry, and geometry depends on what is underneath. If you have not pinned down your shape yet, the mirror method takes five minutes, and the nose bridge types guide explains the dorsal differences behind these maps. Six shapes, six placements.
Straight nose
The least correction of any shape here.
Run two soft parallel lines down the sides of the dorsum, blended outward until they disappear, then a thin highlight down the center from between the brows to just above the tip. Keep both lines narrow, about the width of a cotton swab. Wider than that and the nose reads pinched. Restraint does most of the work on this shape, so build in two light passes instead of one heavy stripe.
Roman or aquiline (convex bridge)
Shade beside the hump, never on it.
Place contour on the bridge just above the prominence and just below it, so those zones visually recede and the bump stops reading as the highest point. Keep the center highlight narrow and even, running straight past the hump without widening there. The eye slides along the light and skips the interruption. (The first time I got this right on a friend, her sister asked if she had slept differently.)
Upturned or celestial
Lower the rotation visually.
Shade the underside of the tip and the columella with a light hand, and the tip drops a few perceived degrees. Then run highlight along the full bridge to stretch the line. Skip shimmer on the tip itself, since light there pushes the upturn further and undoes your shading in one swipe. Two minutes of work, and the nose reads measurably longer from the front.
Bulbous tip
A soft V around the roundness.
Contour the sides of the tip in a V shape, starting at the inner corner of each nostril wing and meeting just above the tip's highest point. Blend until no edge survives. Highlight the bridge but stop before the tip, so focus travels upward instead of landing on the roundness. Leave the alar base bare. Shading out there drags the nose wider, which is the opposite of the brief.
Flat or low bridge
The highlight does the heavy lifting.
Lay a strong matte highlight from between the brows straight down the center, built in two thin passes rather than one thick stripe. Add faint contour along the sides for definition, and keep it faint, because a low dorsum under heavy side shading reads hollow instead of sculpted. Light creates the illusion of height. Shadow only frames it.
Wide nose
Set the lines inside the real edges.
Place the contour lines slightly inside the actual edges of the bridge. If your nose spans 20 mm at the alar base, set the lines 14 or 15 mm apart and blend inward toward the highlight, never outward. Keep the highlight narrow to match. Perceived width shrinks because the eye treats the darker band as the new boundary, and everything outside it quietly leaves the nose.
Each shape has a deeper guide if you want the anatomy behind the map. Read about the Roman nose, the upturned nose, the bulbous nose shape, the flat nose, and the wide nose. A fleshy nose usually follows the bulbous map, with the V drawn a touch wider to account for the softer tip cartilage.
Blending, finish, and longevity
Blend until no line survives, then blend once more. Harsh edges read as dirt in daylight, and daylight is where most contour goes to die. A friend of mine checks her nose in the car's rearview mirror before leaving the driveway, because bathroom lighting lies and the windshield tells the truth.
Build gradually. Two sheer passes beat one committed stripe every time, and you can always add depth where the light demands it. Set the finished work with translucent powder, pressed in with a puff rather than swept. Oily skin wants a primer on the nose before anything else, since the dorsum is where foundation slides first.
And adjust for the hour. Daytime contour should survive a arm's-length conversation without anyone spotting pigment. Evening light forgives more, so you can push the shading a tone deeper for photos and dim rooms.
Common mistakes
- Going too dark on the first pass. Pigment builds; it does not forgive. Start at half the intensity you think you need and add from there.
- Glitter on the bridge at 9 a.m.
- Contouring directly on top of a hump. Shade above and below it, or you spotlight the exact feature you came to soften.
- Skipping the blend at the nostril crease. Product collects in that fold, and an unblended dark patch at the alar base reads as a smudge from across a room.
Frequently asked questions
Can contouring change my nose shape?
Visually, yes, both in person and in photos. Structurally, no. Contour is pigment that imitates shadow and light, and no cream moves bone or cartilage. The effect lasts until you wash your face, and the nose underneath stays exactly the same.
What if I have a hump and a droopy tip?
Combine the two maps. Soften the hump with contour placed above and below the prominence, then shade lightly under the tip to lift the rotation visually. Do the hump first and check the balance before adding tip work, because fixing one often changes how the other reads.
Does skin type matter for nose contour?
Yes. Oily skin breaks contour down within hours, so use a primer and set with translucent powder. Dry skin grabs pigment in patches, so start with a hydrating base and favor cream formulas. Either way, the nose is the oiliest zone on most faces, and it needs more setting than your cheeks do.
How long does nose contour last?
With primer underneath and powder on top, expect six to eight hours before the lines soften. Carry a pressed powder for a midday reset if the day runs long. Without setting, you will see noticeable fading by lunch, sooner in humidity.
Should I contour my nose every day?
Only if you enjoy it. Plenty of people contour a hump for a year and then decide the profile was their favorite feature all along. Makeup is a dial, and you get to choose where it sits each morning.
Next steps
Pick the map that matches your nose, run it in two light passes, and check the result by a window. If you are still guessing at your shape, let the detector settle it first, because contouring the wrong map is worse than contouring nothing. The full nose shape guide covers every type this page touched and a dozen it skipped.